How to Draw a Easy Haunted House
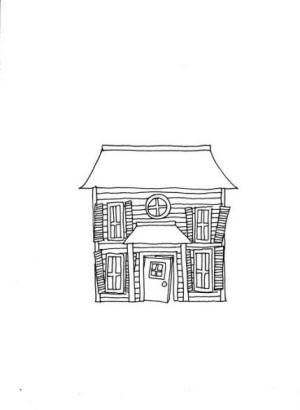
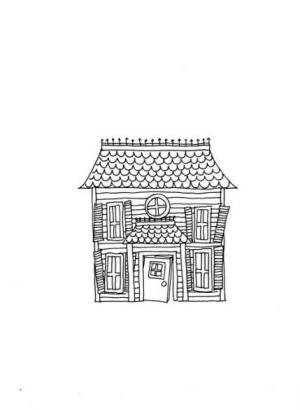
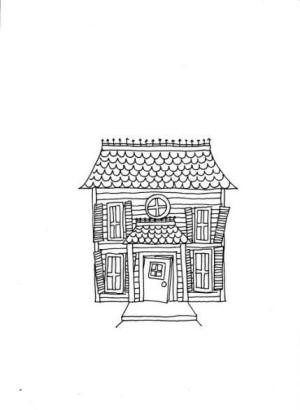
| By following the steps in Mimi's simple drawing lesson (below) you will learn how to draw the haunted house pictured to the right. Using black crayon on dark purple or dark blue construction paper looks great, you can then use white crayon for coloring in the trim of the house and drawing ghosts popping out of the windows. | |
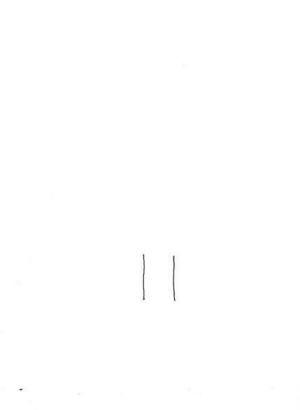
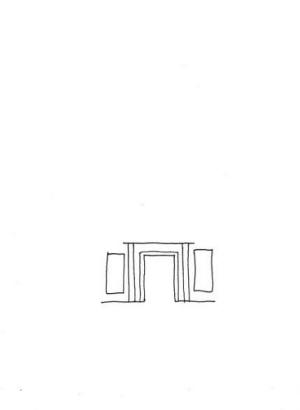
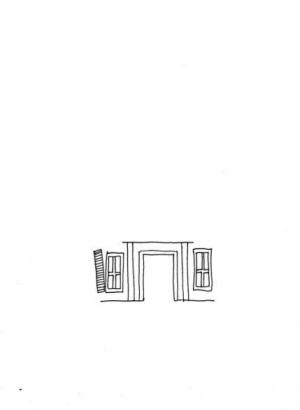
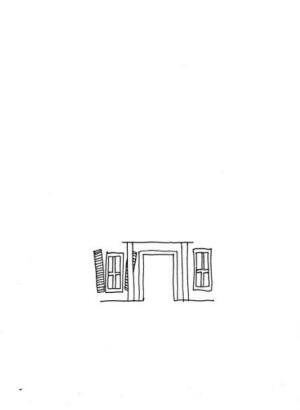
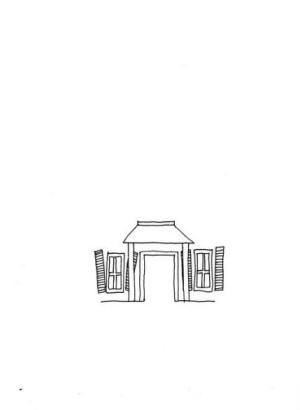
| Step 1 First we start drawing the front doorway. Draw a straight, vertical line "up & down" that does NOT touch the bottom of the page. You are saving the bottom space for other things to draw later. | Step 2 Draw a matching line to the left of your first line. Make sure that it is the same size. |
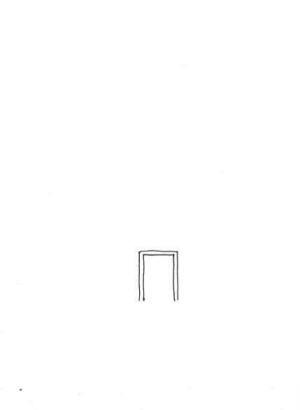
| Step 3 Draw a horizontal (side-ways) line that connects the | Step 4 Draw a line that follows along the first 3 |
| Step 5 One of the many "tricks" that Mimi wants to share | Step 6 Draw a horizontal line that connects the porch posts, have the line go a bit past, on either end. This line will become the bottom of the porch roof. |
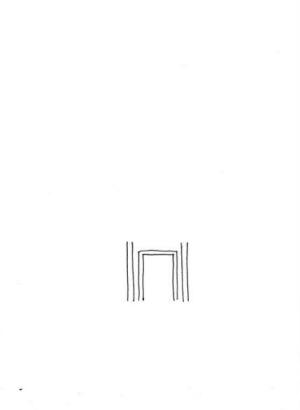
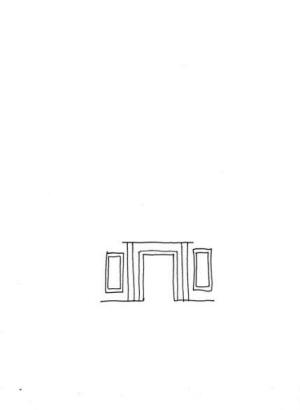
| Step 7 Draw a line from the inner edge of each side of the doorway out to the side... don't make these lines too long, if you need to make them longer afterwards you can always add to them. DON'T draw a line inside the doorway (if you already did, it's OK, it will still look great). | Step 8 Now it is time to draw the 2 downstairs windows! |
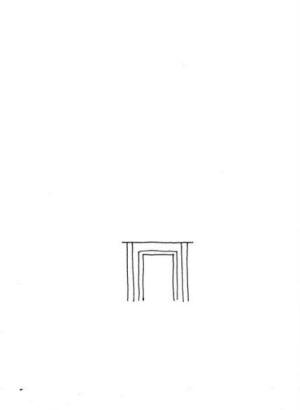
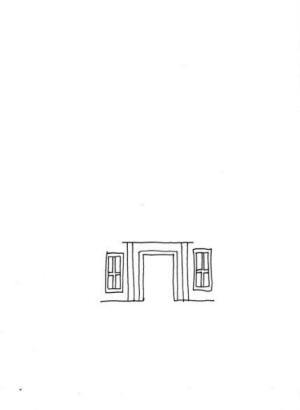
| Step 9 Take a look at your 2 windows... we will be adding the "trim" around the windows, IF your rectangles are kind of narrow looking you may want to draw around the OUTSIDE of them to add the trim... if the windows are a bit too wide then here is your chance to make them appear more narrow by adding the trim INSIDE of them. The trim is just a line that follows along the window, keeping the same distance the entire way. | Step 10 OK, time for adding more detail! Inside of the window draw lines up and down and across, you may want to color them in afterwards so leave space for that. These lines make the window look like it has separate panes of glass. Older houses usually have similar types of window panes. |
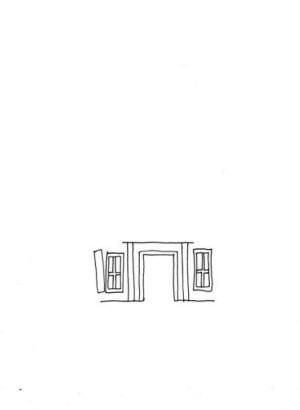
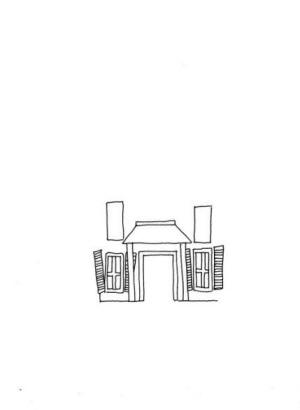
| Step 11 This step is one of Mimi's favorites. Start by drawing a narrow rectangle next to the window on the left, the rectangle needs to be very close to the window but can slant a bit like the one that Mimi drew in the example. Back at Step 5 Mimi shared one of her drawing "tricks"... to 'think ahead'. This step is a good example of this. If we had drawn the lines that make the side of the house before we drew the shutters then none of the shutters could look like they were dangling past the side of the house's edge... | Step 12 Now draw horizontal (sideways) lines all the way up the rectangle. They will look like tiny stripes. |
| Step 13 Here's another example of Mimi's 'thinking ahead' trick. | Step 14 This step is like the steps 11 thru 13, just on the opposite side of the house, but this time you are drawing the shutters next to the second window. |
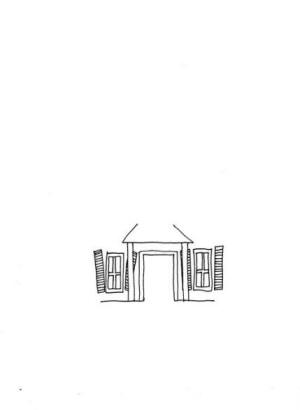
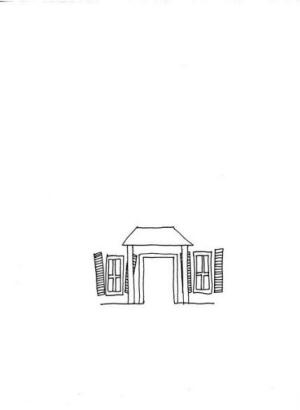
| Step 15 Place your crayon (or pencil/marker, etc) at the left edge of the line that makes the bottom of the porch roof... draw a short line that goes up and in... NOT too far. Then draw the same line on the other side, again... drawing up and in! | Step 16 Now draw a straight line to connect the 2 lines. If you happened to have made a triangle (the 2 lines meet in the center) that's OK, a lot of roofs have that kind of shape. |
| Step 17 Another simple but important detail... draw a line to match the top of the roof (with a line connecting on each side)... more trim. | Step 18 Time for the windows on the 2nd floor. Draw the 2 rectangles directly above the windows on the 1st floor, this will make them look more realistic. |
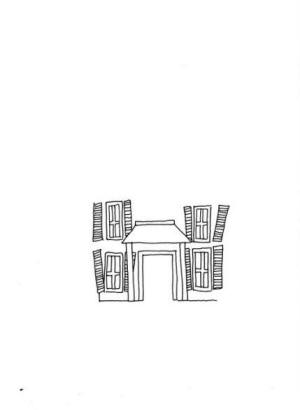
| Step 19 Repeat steps 9 thru 14 so the upstairs windows are similar looking to the downstairs windows. | Step 20 Now it is time for the lines that make up the side of the house! First check to see if the side-way lines that come out from the front door extend far enough, if they don't just draw them a bit longer. The house looks spookier if the shutters can look like they are crooked and hanging off a bit so try to draw the up and down lines for the side of the house so they 'skip' over the shutters, then it will look like they are behind them. Also, be careful NOT to draw the lines too high, just a bit past the tops of the 2nd floor windows. |
| Step 21 Draw a horizontal line (sideways) to connect the 2 sides of the house. If one of the side lines is higher than the other adjust it so that it matches, you want the top line of the house to be nice and straight across, not slanted up or down. | Step 22 The lines that you just drew in Step 21 need matching lines right next to them, leaving a bit of space so you can color them in later if you want. This is the trim on the house. A good thing to do is to look at houses the next time you go outside... you will see that most houses have this trim! Brick, stone or stucco houses don't, or log cabins... hey, Mimi can draw those types of houses in other lessons! She likes to draw everything!!!! |
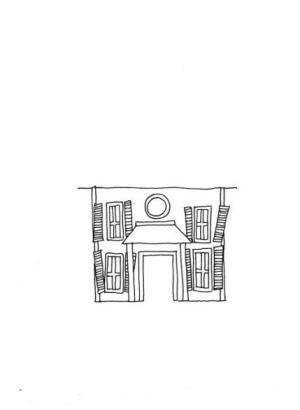
| Step 23 Now that the sides of the house are drawn we can make the top roof edge stick out a bit on both sides! Just draw a SHORT line out from either end of the top roof line. | Step 24 If you have extra space between the top of the porch roof and the house roof line you can draw a little window. many old houses have interesting little windows that are circles or squares, in Mimi's example she drew a circle shaped window. |
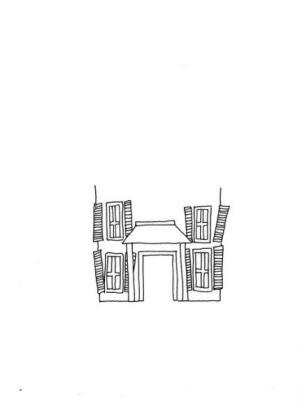
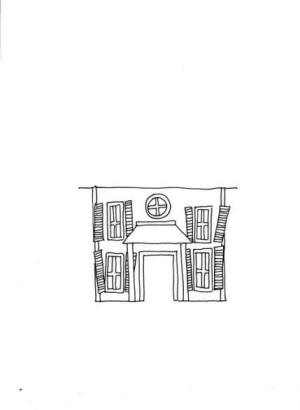
| Step 25 Again, details are very important! Draw a line for the trim (either inside of your window or around the outside, depending on if it was a bit too big or a bit too little window, just like in Step 9) | Step 26 And, add the inside lines to make the window look like it has window panes! |
| Step 27 The lines for the sides of the roof should match the lines that you drew for the porch roof, both slanting in a bit but NOT touching at the top. Mimi is trying NOT to draw a triangle shaped roof for this house... | Step 28 Draw a horizontal (sideways) line that connects the 2 side roof lines and draw a second line right next to it (more trim!) |
| Step 29 Time to draw the door! Now you can see why Mimi suggested to not draw a bottom line in the doorway (if you did don't worry! It will just look like the door is closed!) Draw a rectangle that is a bit 'tipped', this will make it look like the door is opened a bit. You can slant it up or down, one way looks like the door swings out, the other way makes it look like the door swings in... Also draw a matching line very close to the door, this will make the door look more 'solid'... connect the ends of the line to the corners of the door line like this: / | Step 30 Time to draw another window!!!! Draw a window on the door. You must feel like a window-drawing expert now! |
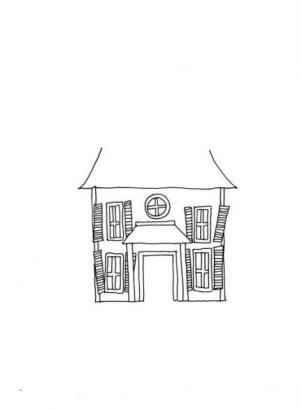
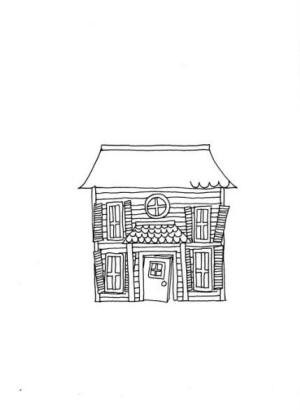
| Step 31 Old houses often have roofs made out of slate. Sometimes the slate was cut so it had a curved edge to it. Draw a "U" shape over and over again to make the slates on the porch roof. Start at the BOTTOM part of the roof and draw the "U' shape going sideways. Once you have one row completed skip up a bit and draw another row. Try to keep the shapes all the same size. | Step 32 Now draw the slates on the house roof. |
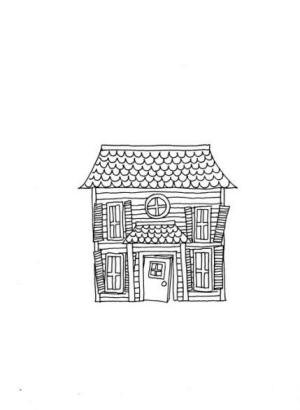
| Step 33 Here's another interesting thing that you may see on an old house, tiny fence-like metal edging. Mimi doesn't know the real term for it but thinks it was for keeping the pigeons from sitting on the edge of the roof! Anyways, drawing it makes the old house look even spookier! Draw tiny little lines going "up" from the top of the roof. Draw them close together, remember, keep them short! | Step 34 Draw a line connecting all of the tiny lines that you made in step 33. Plus, draw a tiny upside-down "V" on the top of each of the lines (they will look like little arrows pointing up) |
| Step 35 The steps are drawn with little lines going outward / \ from the porch posts. Draw a horizontal (sideways) line to connect them. Then draw 2 short lines going straight down, then, to make more steps, just repeat by drawing 2 more / \ lines and connect | Step 36 Mimi drew little circles underneath the house to make it look like a stone foundation (cellar walls), then oval, wiggly circles in front of the steps to look like a path made out of stone. Tiny lines going out from the bottom of the house (both sides) will look like grass. If you want to draw a tree and need help just check out Mimi's 'step-by-step' tree lesson! |
| To see an example of the Haunted House check out Mimi's 'Drag & Drop' Halloween Game! | |


kennedydelonost1959.blogspot.com
Source: https://www.mimitheartist.com/for-kids/art-lessons/drawing-lessons/how-to-draw-a-haunted-house
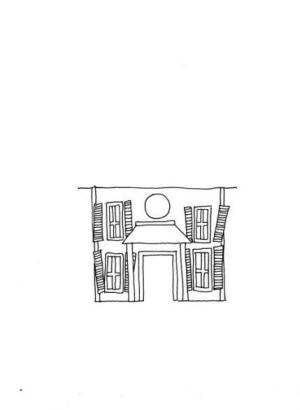
0 Response to "How to Draw a Easy Haunted House"
إرسال تعليق